
Cabinet Hardware for Salt Air: Finishes That Corrode and Finishes That Last

Remodeling in an HOA Community: The Approval Steps Myrtle Beach Homeowners Miss

An island is the most requested feature in a kitchen renovation and the one most likely to make a kitchen worse.
Not because islands are a bad idea; they are usually a very good one. But because an island is the only element in a kitchen that takes space away from circulation in order to add work surface, and if the arithmetic is wrong, you end up with a beautiful obstacle that everyone has to edge around while carrying a hot pan.
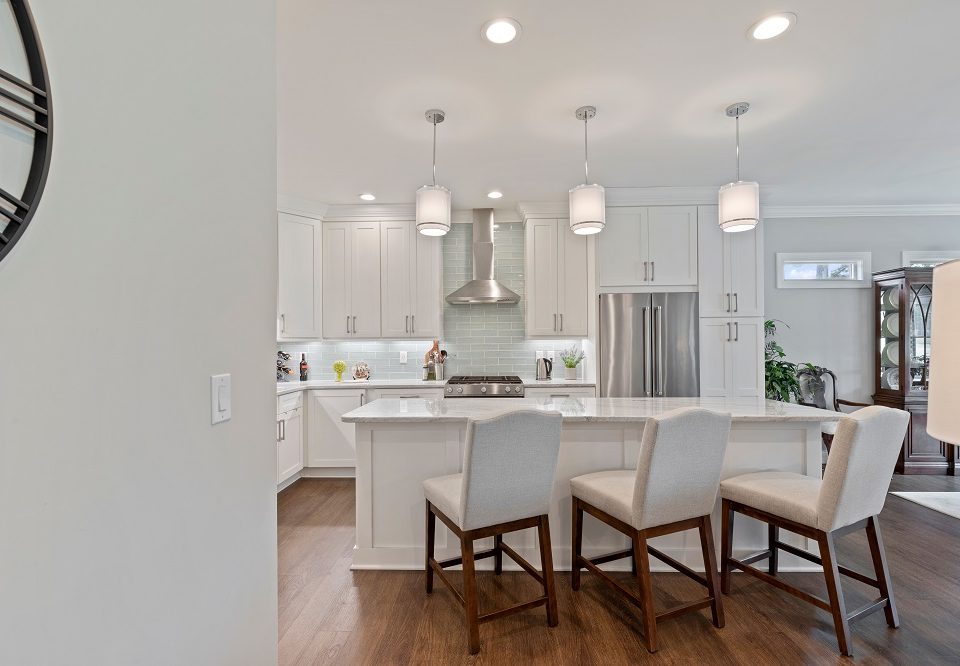
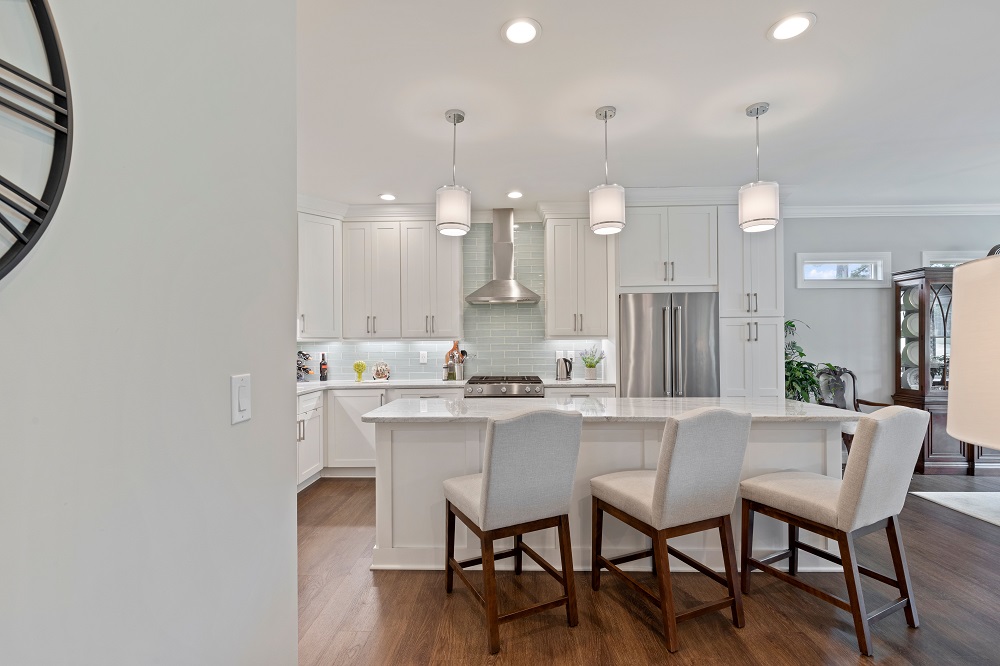
At The Cabinet Market, island sizing is the single most common layout question we field, year in and year out. It comes up constantly in Carolina Forest and the newer Grand Strand neighbourhoods, where open-concept plans give you a big room but not always a well-proportioned one: plenty of square footage overall, and a kitchen footprint that is narrower than it looks.
This is a numbers problem, and numbers are easy to check before anything is built. Here are the ones that matter.
Start With the Room, Not the Island
Almost everyone approaches this backwards: they decide what size island they want, then try to fit it. Do the opposite. The room determines the island, and the constraint is almost always width, not length.
The 13-foot rule
Here is the calculation that answers most questions immediately. For an island with cabinetry on both sides, you are stacking five dimensions across the room:
| Element | Depth |
|---|---|
| Perimeter base cabinet | 24″ |
| Working aisle | 42″ |
| Island | 24″ |
| Working aisle | 42″ |
| Perimeter base cabinet | 24″ |
Total: 156 inches, 13 feet.
That is the practical minimum clear width for a kitchen with an island and cabinets on both sides. Below 13 feet, something has to give: a narrower island, tighter aisles, or cabinetry on only one side.
Measure your kitchen’s width right now. That one number tells you more than any amount of browsing.
What to do when you have less
Falling short of 13 feet does not mean no island. It means a different island.
- 11 to 13 feet: Workable with a shallower island, 18″ to 21″ deep instead of 24″. You lose some worktop but keep the aisles honest. A 21″ island still functions well for prep.
- 10 to 11 feet: An island becomes a squeeze. A peninsula, connected at one end, is usually the better answer, because it eliminates one aisle entirely while keeping most of the benefit.
- Under 10 feet: A fixed island will make the room worse. A rolling cart or a small movable table gives you the extra surface without permanently narrowing circulation.
There is no shame in a peninsula. It is frequently the smarter solution in a room that cannot support an island, and it does the same three jobs: prep space, storage, and a place for people to sit and talk to whoever is cooking.
Aisle Clearances: The Numbers That Matter
Not all gaps around an island are equal, and this is where a lot of plans quietly go wrong.
Working aisles: 42 inches minimum. This is any aisle where someone stands and works: between the island and the range, the sink, or the refrigerator. Forty-two inches lets one person work comfortably with a dishwasher or oven door open.
Working aisles with two cooks: 48 inches. If two people genuinely cook together, 48″ is the difference between cooperation and collision. This is worth prioritising if it describes your household.
Walkways: 36 inches minimum. Any aisle that is purely circulation, where nobody stands and works, can come down to 36″.
Behind seated diners: add clearance. A person sitting at an island occupies roughly 24″ of depth once the stool is pulled out. For someone to walk behind a seated diner comfortably, you want around 44″ from the island edge, and about 36″ if people will only be edging past occasionally.
That last one is the most frequently missed number. Plans get drawn with 42″ behind the seating side, which is fine when nobody is sitting there and cramped the moment the stools are occupied, which is precisely when the kitchen is busiest.
The other common error is measuring to the cabinet face and forgetting the appliance. An oven door or dishwasher door swings 24″ or more into the aisle. If your 42″ aisle has a dishwasher on one side, the usable space with that door open is about 18″.
Seating: Overhang, Width, and Why Most Islands Get This Wrong
Island seating is where good intentions produce uncomfortable results, because the overhang is usually too shallow.
Overhang depth by counter height
Knees need somewhere to go. The required overhang depends on how high the surface is:
| Surface height | Overhang needed |
|---|---|
| Table height: 30″ | 18″ |
| Standard counter height: 36″ | 15″ |
| Bar height: 42″ | 12″ |
The logic is that a lower seat means legs extend further forward, so more knee room is required.
A 36″ island with a 12″ overhang (which is extremely common, because 12″ is a convenient number) leaves adults perched on the edge with their knees against the cabinet. Fifteen inches is the number for standard counter height. It is worth the three extra inches.
How many stools actually fit
Allow 24 inches of width per stool as an absolute minimum, and 28 to 30 inches for genuine comfort. Backless stools tolerate the lower figure; stools with backs and arms need the higher one.
So a 7-foot island edge fits three stools comfortably at 28″ each, or four if you accept 21″ each, which nobody will be happy with.
Also account for the ends. You need roughly 12″ of clearance at each end of the seating run so the outermost person is not sitting against a wall or hanging off the corner.
Quick sanity check: if you want four comfortable seats, you need about 8 feet of uninterrupted island edge with a 15″ overhang behind it. If your island is 6 feet long, you have room for two comfortable seats or three tight ones. That is the honest answer, and it is better to know it now than after the countertop is templated.
How Big Should the Island Itself Be?
Once clearances are settled, the island’s own dimensions follow.
Minimum useful size: about 40″ × 24″. Below that it is a table, and it will not carry meaningful storage or prep area.
The comfortable general-purpose range: 3 to 4 feet deep by 5 to 8 feet long. This gives real prep space, real storage, and room for seating on one side.
Depth above 48″ is a mistake unless you can reach it from both sides. Anything in the centre of a 5-foot-deep island is unreachable, and that middle strip becomes a permanent home for mail and car keys.
Length above about 10 feet starts to work against you: it becomes a wall that people walk around rather than a surface they gather at. Two smaller islands sometimes serve a very large kitchen better than one enormous one, provided the aisle between them respects the same clearances.
If You Are Putting a Sink or Cooktop In It
Adding a fixture changes the calculation and adds cost, and both deserve thinking about early.
Landing space is not optional. A sink or cooktop needs clear counter on both sides; you want a meaningful landing area either side of a sink for dishes, and either side of a cooktop for hot pans. This is the single biggest reason islands with fixtures need to be longer than people expect. A 5-foot island with a sink in the middle leaves roughly 18″ on each side, which is not enough to work at.
A cooktop needs ventilation, and in an island that means either a ceiling-mounted hood (a significant visual and structural commitment) or a downdraft unit. Both cost considerably more than a wall-mounted hood over a range against a wall.
Plumbing and electrical have to reach the island, which in slab-on-grade construction, common across the Grand Strand, means either cutting and trenching the slab or rerouting overhead. This is one of the larger cost variables in an island project and it is worth pricing before the design is finalised rather than after.
Receptacle requirements for islands have changed across recent National Electrical Code cycles, and which version applies depends on what your jurisdiction has adopted. It is worth confirming current local requirements with your contractor rather than assuming; the rules are genuinely different than they were a few years ago.
Structural and Practical Realities People Discover Late
A few things that are easy to design around early and expensive to fix late:
- Countertop overhangs need support past a certain point. Many fabricators will support stone overhangs up to around 10 to 12 inches unsupported, depending on the countertop material and thickness; beyond that, corbels, brackets, or steel plates are typically required. Since comfortable seating needs 15″, most seated islands need some form of support. Concealed steel is the cleanest solution and needs to be planned into the cabinetry, not added afterward.
- Seating side means no cabinet doors on that side. You are trading storage for seating along that entire run. Plan the storage elsewhere.
- Electrical outlets in the island need locating where they will not be blocked by knees or look awkward in the panelling: pop-up units and under-lip strips both work, and both are easier to specify in advance.
- Lighting is decided by island length, not by taste alone. Two pendants suit most islands up to about 7 feet; three usually suit 8 feet and above. Spacing them evenly and symmetrically about the island’s centre is what makes the result look intentional.
Island, Peninsula, or Cart: An Honest Decision Tree
Choose an island if: your kitchen is at least 13 feet wide (or 11 with a shallower island), you can maintain 42″ working aisles, and you have at least 40″ × 24″ for the island itself.
Choose a peninsula if: your kitchen is 10 to 12 feet wide, or the room has only one practical circulation route, or you want seating and prep without giving up a second aisle.
Choose a cart or movable table if: your kitchen is under 10 feet wide, you want flexibility more than storage, or you are not ready to commit to a permanent layout change.
The right answer is whichever one leaves the kitchen easier to move through than it is now. An island that fails that test is not worth having, however good it looks in a rendering.
Check the Numbers Before You Fall in Love With a Plan
Almost every island problem we are asked to solve was decided at the measuring stage, not the building stage. Width of the room, depth of the aisles, depth of the overhang: three numbers, checked in ten minutes with a tape measure, before anyone commits to anything.
If those numbers work, an island is one of the best investments you can make in a kitchen. If they do not, knowing that early lets you design something that actually fits, which is a far better outcome than an island you have to apologise for.
If you would like a second set of eyes on the arithmetic, that is exactly what a kitchen layout consultation is for. We will look at your room, run the clearances, and tell you honestly whether an island, a peninsula, or something else serves the space better. You can see how different island configurations resolve in real Grand Strand homes in our portfolio of completed kitchens, and our guide to designing a kitchen island covers the design considerations that sit alongside the dimensions.
Frequently Asked Questions
How much space do you need around a kitchen island?
Working aisles, where someone stands and works, need at least 42 inches, or 48 inches if two people cook together. Pure walkways can come down to 36 inches. Behind seated diners, allow around 44 inches so people can pass comfortably when the stools are occupied.
How wide does a kitchen need to be for an island?
About 13 feet of clear width for an island with cabinetry on both sides: that is 24″ of base cabinet, 42″ of aisle, a 24″ island, another 42″ aisle, and 24″ of base cabinet. Between 11 and 13 feet, a shallower 18″ to 21″ island can work. Under 10 feet, a peninsula or cart is the better answer.
How much overhang do you need for island seating?
Fifteen inches at standard 36-inch counter height. Bar-height surfaces at 42 inches need 12 inches, and table-height surfaces at 30 inches need 18 inches. Twelve inches at counter height is very common and leaves most adults without enough knee room.
How many stools fit at a kitchen island?
Allow 24 inches per stool as a minimum and 28 to 30 inches for comfort, plus about 12 inches of clearance at each end of the run. An 8-foot island edge seats four people comfortably; a 6-foot edge seats two comfortably or three tightly.
What is the minimum size for a kitchen island?
Around 40 inches by 24 inches. Below that it will not hold meaningful storage or provide usable prep space, and a rolling cart would serve the same purpose with more flexibility.
Should I put a sink or cooktop in my island?
Only if the island is long enough to provide proper landing space on both sides of the fixture. It also means running plumbing or electrical to the island, in slab-on-grade homes, common across the Grand Strand, that can be a significant cost, and a cooktop requires ventilation, which means a ceiling hood or a downdraft unit.
Is an island or a peninsula better for a small kitchen?
A peninsula, in most cases. It eliminates one aisle entirely while still providing prep space, storage, and seating. In a kitchen under about 11 feet wide, a peninsula usually produces a room that works better than a cramped island.
Get a Free Kitchen Layout Consultation
Bring us your room dimensions and we will run the clearances with you, and tell you honestly whether an island, a peninsula, or a different layout entirely serves the space best. Get a free layout consultation or call (843) 293-3030.